

Getting started
Fortune’s Weave is a Fire Emblem game played in parts. In Part I you follow one of four routes, each led by a different lord, and recruit a different mix of characters along the way. Between battles you spend free time on training, meals, gifts and quests, and two long-running scores, Renown and Support, decide who will join you. This page explains those pieces in the order a new player meets them: which route to try first, what Renown and Support do, what each free-time activity is for, what to do in the first few chapters, and the mistakes players most often say they regret. Read it once before you start, then use the linked guides when you need the detail.
Sourced facts link to the guide or wiki page they came from. Advice from the guide author’s own play on Dietrich’s route carries a marker◇ our recommendation: the guide author's own play and is experience, not a sourced fact. Check the linked source for anything you are relying on.
Daily and weekly routine
The author’s own playthrough habit for day-to-day upkeep once free time opens◇ our recommendation: the author's own play routine, laid out below fact by fact with its own marker, not a single source’s own checklist. For a tickable list of everything that repeats each week, see the weekly checklist.
- Every day you have free time: give a gift, share a meal, and train at the Arena. Arena training matters most of the three — it is the main way to level a unit’s weapon and magic skills through Skill Exp. ◇ our recommendation: the author's own daily habit See Gifts and Meals below for what each unlocks.
Do Meals and Arena training on Sunday where you can: Arena training is 50% off both Saturday and Sunday, Meals are half price on Sunday, and Sunday is also the day the weekly reset falls on.(game8.co, game8.co, ign.com)
- If you miss Sunday, train at the Arena on Saturday instead — still discounted per the source above — but expect to pay full price for Meals, since their discount is Sunday only. ◇ our recommendation: the author's own fallback routine
- Gift priority once several recruits are competing for your gold and weekly gifts: start gifting Support 3 recruits as early as you can and keep it up every chapter. Support 2 recruits are less urgent. Support 1 recruits need only the first gift, which opens meals with them. Share meals with your Lord specifically to raise support levels with them. ◇ our recommendation: the author's own recruitment routine See Support priority for the full, character-by-character version of this rule.
Farming gold
Advance time at an inn using the Search auto-activity: guides list it as a gold source but give no yield figure. The author’s own game nets roughly 200–300 Gold per turn this way, making it the best documented gold farm. ◇ our recommendation: the author's own play, not documented in any source read for this page
The four routes
The story is built around a customisable protagonist, Eshmel, whose involvement alters each of four Flame Lords’ individual stories, set during the Heroic Games event in the capital city Dagsion.(keengamer.com)
Part I has four playable lords (Cai, Dietrich, Theodora, Leda), each running a full separate path from Chapter 1. All four routes exist at once inside a single save file: you can pause one route and switch to another through a hub in Dagsion (the Obelisk Chamber, also called Pale Raven’s Perch), then come back to it later with your progress preserved.(game8.co, keengamer.com)
Each Part I route runs 12 chapters, a figure two independent sources agree on.(thegamer.com, fireemblemwiki.org)
The routes do not fully converge: the same recruitable character can need different Renown depending on which lord’s path you are on. Example given by one guide: Loretta needs 5 Renown on Theodora’s path but 8 Renown on Dietrich’s.(rpgsite.net)
Part II has six chapters and Part III has six sections, so the story is 60 numbered units: 48 in Part I, six in Part II and six in Part III.
Reaching the credits on one path takes roughly 45–50 hours; seeing every lord’s story can run past 120 hours. Part II takes roughly 6–8 hours; all of Part III takes most players under 12 hours.(thegamer.com, videogameschronicle.com)
Community-recommended order for a first playthrough: Cai first (steadiest pace, teaches the full Part I loop, smaller map to learn on), then Theodora (battalion management and resource stockpiling), then Dietrich (combat-heavy, best attempted once the basics are down), then Leda last (her Perform Quests and map-discovery content land better once the map’s secrets are already known). Game8 independently recommends the same order — Cai → Theodora → Dietrich → Leda — reasoning that Cai’s route is the easiest (a limited map and generous early materials/mounts), which lets Support, Blessing and Boons of Salvation progress (shared between paths) carry into the harder routes at a head start.(keengamer.com, thegamer.com, game8.co)
IGN’s own side-by-side comparison of the four Flame Lords’ starting kit:
| Lord | Personal ability | Starting weapon | Blaze Art | Difficulty |
|---|---|---|---|---|
| Cai | Brio (Move +1) | Spear | Underworld Blast (ranged, hits multiple targets) | Beginner-friendly: straightforward story, early balanced team with mentoring allies. |
| Dietrich | Murderous Intent (Crit +5 if he attacks first) | Answerer (Sword) | Ink-Black Wen (short teleport through obstacles) | More advanced: few early allies, melee-only start, no built-in ranged/magic support. |
| Theodora | Royal Resolve (30% chance to halve incoming damage) | Mahadu's Spear | Earthen Throw (long-range boulder hitting targets in a straight line) | Large starting cast covering every basic role; a durable, armoured playstyle. |
| Leda | Blindside (5% chance to be uncounterable if she attacks first) | Bow, Sword | Obsidian Songs (buffs nearby allies with Spellsongs) | Slightly more advanced support role; large initial group with offensive and healing magic. |
Cai
Personal ability: Brio (Move +1)
Starting weapon: Spear
Blaze Art: Underworld Blast (ranged, hits multiple targets)
Beginner-friendly: straightforward story, early balanced team with mentoring allies.
Dietrich
Personal ability: Murderous Intent (Crit +5 if he attacks first)
Starting weapon: Answerer (Sword)
Blaze Art: Ink-Black Wen (short teleport through obstacles)
More advanced: few early allies, melee-only start, no built-in ranged/magic support.
Theodora
Personal ability: Royal Resolve (30% chance to halve incoming damage)
Starting weapon: Mahadu's Spear
Blaze Art: Earthen Throw (long-range boulder hitting targets in a straight line)
Large starting cast covering every basic role; a durable, armoured playstyle.
Leda
Personal ability: Blindside (5% chance to be uncounterable if she attacks first)
Starting weapon: Bow, Sword
Blaze Art: Obsidian Songs (buffs nearby allies with Spellsongs)
Slightly more advanced support role; large initial group with offensive and healing magic.
(ign.com)
What each route unlocks
Each lord has systems and Advanced classes the other three lack. Pick a first route for the system you want to play with, because the classes follow you anyway.
Cai
Systems: Mount capture and the Stable. Game8 says capturing animal mounts is exclusive to Cai’s path, and the Stable opens through a quest during his route. He also gets mentor lessons and crop trading.(game8.co, game8.co)
Advanced classes: Caladrius, Dragoon and Troubadour, each through a mentoring quest. Dragoon has a second way in on Theodora’s route and Troubadour on Leda’s; Caladrius is listed for Cai only.† single source(gamerant.com)
Dietrich
Systems: Bounties that pay Renown, gold and special Combat Arts, plus Answerer’s Cry, which reveals enemies on the world map. His resources come mostly from combat and dungeons.† single source(game8.co)
Advanced classes: Blacksmith, on this route only: raise Smyrnos’s blessing, upgrade Combat Arts, then sit the Advanced exam.(gamerant.com, allthings.how) Ranger and Guardian come from his Dread Warrior Challenges.† single source
Theodora
Systems: Battalions and Gambits. Game8: “The Gambit command and Battalions can only be used by Theodora and her allies.” She also travels the Dagdan waterways by boat. The chapter where the first battalion arrives is not yet documented.(game8.co, game8.co)
Advanced classes: Cataphract, on this route only: finish the Send Supplies fish deliveries, then pass the exam (Advanced License, Level 35, Renown 8, Heavy E+, Rider D, Axe B, Spear B).(allthings.how) Dragoon and Guardian have Send Supplies quests here too.† single source
Leda
Systems: Tavern performances that earn tips on Secret Spots, which hold rare items found on no other route, and drinks that raise the drinker’s stats.† single source(game8.co)
Advanced classes: Ranger and Troubadour, both through the Elegant Drink Recipes quest. No class is recorded as exclusive to Leda.† single source(gamerant.com)
Shido, Light Cavalry and Bardinger are tied to no route in any source read for this page. Exam requirements for every class are on the classes page, mounts on the mounts page and battalions on the battalions page.
Shared across all four Part I routes: Support levels, certified classes, Boons of Salvation, temple blessings, map exploration with its posthouse routes, and finished bulletin-board subquests. Unit levels and items stay with the route that earned them.(allthings.how, keengamer.com)
So a class certified on one route can be taken on the next. allthings.how says the same of Blacksmith once it is unlocked.† single source(allthings.how) Mounts and battalions are less clear. In the author’s game, what a route unlocks stays unlocked on the routes played after it, which makes the first route the one that decides what the others start with.◇ our recommendation: the guide author's own play Game8’s wording points the other way for both systems (capture is “exclusive to Cai’s Path”, battalions are for “Theodora and her allies”), and no source says whether a mount caught on Cai’s route can be ridden on another. That part is not yet documented.(game8.co, game8.co)
This guide’s view: follow Game8’s order above and start with Cai. Mounts touch more of the roster than any single class does, and a route-locked class is a reason to finish that route’s quests at some point, not a reason to play it first.◇ our recommendation: the guide's own view, drawn from the sourced unlocks above Leda’s Secret Spots and Dietrich’s dungeons are easier to find with the world map open beside the game.
Finish Part I on every route
Completing a lord’s Part I path is a Notable Deed worth 5,000 Karma Shards, once per lord, so 20,000 across the four. Neither Game8’s deed list nor Fextralife’s has an equivalent deed for Part II.† deed rewards not yet confirmed in game(game8.co, fortunesweave.wiki.fextralife.com)
Part II can be skipped route by route. After a Part I path ends, the Strife Obelisk offers to play or skip that path’s Part II; skipping still carries the route’s units forward and gives them some levels, while playing it leaves you in charge of how they grow.(game8.co)
The author’s advice: play all four Part I routes before worrying about Part II. The Karma Shards are the obvious reason. The other is classes: some characters only reach their best class once another lord’s Part I has unlocked it. Playing Part II levels your classes better than the skip does, but four runs of it is a long slog, so play it for the army you care about most and skip the rest.◇ our recommendation: the guide author's own play
Focus or spread your levels
Focus inside a route, spread between routes. That is this guide’s view, and it follows from what carries over.◇ our recommendation: the guide's own view, drawn from the carry-over rules above
Levels do not carry between routes, so pouring a second route’s experience into the same faces rebuilds what you already had. Supports and class certifications do carry, which means the second cast starts with the first cast’s classes open and its bonds intact. Within one route, keep to a core you can actually deploy: you recruit more people than a route has maps to train them on. Then pick different people for the next route, and where the same character must appear twice, give them a different class line (see Common regrets below).
Renown and Support
Renown (R) is a global progression stat, raised by completing quests, Adventure Guide goals, subquests, paralogues, and “audiences with gods.” Higher Renown improves Training Grounds gains and Meal effects, and gates class tiers: Specialty classes need Renown 4, Advanced classes need Renown 8. As above, the Renown a specific character needs to recruit can differ by route.(rpgsite.net, game8.co, thegamer.com)
IGN gives some numbers not stated in the sources above: a main chapter clear grants 500 Renown even though it is never listed as a reward, and visiting a temple whose icon shows orange on the Dagsion map screen for an audience with its patron grants 50 Renown on the spot. Each Flame Lord also has their own quick-Renown activity worth prioritising — for example Leda’s tavern performances or Dietrich’s duel bounties (see Hero talents).(ign.com)
What each Renown level unlocks
Each Flame Lord has a separate Renown level, so these levels are per lord.(hyperts.net, gamewith.jp) The points needed for the first three level-ups are reported as 100, then 500, then 1000; the figure for later levels is not given.(hyperts.net)† unverified
| Level | What it unlocks |
|---|---|
| 2 |
|
| 3 |
|
| 4 |
|
| 5 |
|
| 6 |
|
| 7 |
|
| 8 |
|
| 9 |
|
| 10 |
|
| 11 |
|
| 12 |
|
Ways to earn Renown outside subquests, from IGN's 'Things Fortune's Weave Doesn't Tell You' (read 2026-10-19).
| Source | Renown |
|---|---|
| Completing a main chapter missionNever listed as a reward, so it is easy to forget. | 500 Renown† unverified(ign.com) |
| A temple audienceVisit any temple whose icon shows orange on the Dagsion map and seek an audience with its patron. | 50 Renown† unverified(ign.com) |
| Special chapter events, such as a Private Exhibition MatchIGN gives no number. | Substantial (no figure given)† unverified(ign.com) |
| Each Flame Lord's own quick routine, such as Leda's performances or Dietrich's Headhunter DuelsIGN advises doing these whenever possible. | Not stated† unverified(ign.com) |
Support (S) is the support level between a recruitable character and your chosen Lord, tracked as 1S/2S/3S across the whole save file and never decreasing. It is raised through gifts, inviting characters to meals, Stage Shows/theatre invitations, arena training, and battle participation, and is used mainly to unlock recruitment and support conversations.(rpgsite.net, videogameschronicle.com)
IGN’s own recruitment guide describes what may be this same idea as two separate meters instead: an overarching Renown Level, and a per-character Bond Level 1–3 (raised the same way — gifts, meals, Theatre). Bond Level 3 takes considerably more time and money than Level 2. Some recruits also need a final Negotiation once those levels are met — dialogue choices, an item trade, or a subquest — which IGN states can never be permanently failed, only retried. ◇ our recommendation: Renown/Bond and this page's Renown/Support may name the same underlying numbers, but no source states the mapping explicitly, so both namings are given side by side rather than treated as equivalent(ign.com)
IGN’s Supports and Romance guide separately describes a numeric Support Rating (1 up to a maximum of 5) alongside named Support Conversations (Rank C rising to Rank A, or Rank S for pairings with Eshmel specifically). This may be the same 1S/2S/3S scale described differently, or a genuinely different pre-/post-recruitment pair of systems — not resolved by this pass.(ign.com)
Missable: missing the window to view a character’s C support conversation permanently blocks viewing their B support later, even once support is high enough — the only fix is replaying from an earlier chapter where the C support was still available.(ign.com)
Is it worth recruiting people late?
A common worry: does a character you recruit late join weaker than one you get early? No guide states this as a rule, but this site’s own data gives a partial answer.
† unverified fireemblemwiki.org’s per-character stat pages pair a base-stats table with the level it was recorded at — but only 15 of the 65-character roster have this at all. Five of those are Part I starters, all Level 1 (Cai(fireemblemwiki.org), Tialla, Peter, Fabio, Buccar). Six more are recorded at Level 5 or 6. The other four read much higher. Eshmel, who is with you from the prologue, is recorded at Level 40, so that is not a late recruit either. The other three are named behind the reveal because they belong to Part III.
What is genuinely not established by any source: whether a character gated behind a high Renown/Support requirement within Part I — recruited late on your current route rather than automatically later in the story — also joins at a higher level, or always joins at the same fixed low level regardless of how late you personally get to them. Nothing read for this page answers that either way.
Growth rates are a fixed, personal figure for each character, not something that changes with recruitment timing — no source suggests a late joiner gets boosted growths to compensate. What the game does give you, regardless of when you recruit someone: Arena training as the main out-of-battle way to raise skills, the account-wide Increase EXP Boon of Salvation (bigger after clearing more Part I paths), and weapon/class Manuals that raise a unit’s class skill fast. Support you have already invested toward a late recruit is never wasted — it is a single running total that never resets. Renown is not established the same way: no source states it is never spent or reset the way Support is, so it is left out of that claim rather than assumed alongside it.
◇ our recommendation: the guide author's own recommendation, drawn from the sourced facts above rather than stated outright by any single guide Recommendation: recruit anyone you can reasonably reach the Support/Renown gate for. This data doesn’t support “wait and they’ll be worse” as a reason to skip a character — the one sourced example of a genuine late joiner is levelled up to match their point in the story, and fixed growth rates plus the catch-up tools above (Arena training, Increase EXP, Manuals) apply to a late recruit the same as an early one. The real cost of recruiting someone late is simply fewer maps left to use them in on that playthrough, not a stat penalty this data can show.
One more thing worth knowing if you use chapter restarts to build Support quickly: when you restart a chapter (from the inn, or the in-game chapter-restart option), Support levels you’ve already built are kept, even though most of that chapter’s other progress resets to how it was at the start. ◇ our recommendation: the author's own play; corroborated below by an independent source, not merely restated You can use this to raise Support with everyone fairly quickly, so Renown becomes the real gate on recruitment rather than Support. ◇ our recommendation: the author's own recommended exploit of the mechanic above IGN independently confirms the Support side of this: completing a chapter takes a snapshot of your progress, and returning to an earlier chapter reverts most of that snapshot — but Support is explicitly called out as carrying over “even when replaying previous chapters.”(ign.com) This is narrower than “everything is kept,” though: no source says whether gold, items or your recruited roster survive a same-chapter restart the same way — only Support is stated to.
Difficulty and modes
Fortune’s Weave offers two Difficulty settings and two separate game Modes. Normal Difficulty is aimed at new and intermediate players and has weaker enemies; Hard Difficulty raises enemy levels and stats for a bigger challenge, and also raises the Divine Sand cost of every Blessing, including Fortuna’s Blessing.(game8.co)
Casual Mode and Classic Mode control what happens when a unit is defeated. Casual retreats a fallen unit for the rest of that map only, so they can be redeployed on a later map; Classic is the series’ traditional permadeath, where a fallen unit stays unavailable for the rest of that save.(game8.co)
Change Difficulty at any time at the Shrine of Causality in the Obelisk Chamber, without affecting your story progress — but only downward: you cannot switch back to Hard once you have lowered to Normal this way. Raising Difficulty instead needs Descend Again from the title screen, which replays the Prologue (see Replay and New Game+ below).(game8.co)
IGN confirms the same asymmetry and adds one detail: replaying the Prologue to raise Hard Mode back on keeps your other chapter saves intact, and also lets you re-customise Eshmel’s appearance.(ign.com)
The source’s own recommendation: Normal Casual to learn the game with no risk of losing a unit, Normal Classic for the traditional Fire Emblem experience once you’re comfortable, and Hard Classic for a genuine challenge on a later run.(game8.co)
The curve is not flat. In the author’s game Part I was fairly easy and the Part II battles were hard, enough that a team which coasted through Part I needed its blessings and better classes to get through.◇ our recommendation: the guide author's own play; no published source compares difficulty by part If Part I feels comfortable, spend the slack on class exams and temple service, not on a higher difficulty.
Blessings
A blessing is a one-turn effect you trigger in battle with Divine Sand, which refills after every chapter. Each god’s blessing has three levels, raised by Divine Service at that god’s temple during free time, and service on the god’s holy day fills the gauge faster.(game8.co, game8.co)
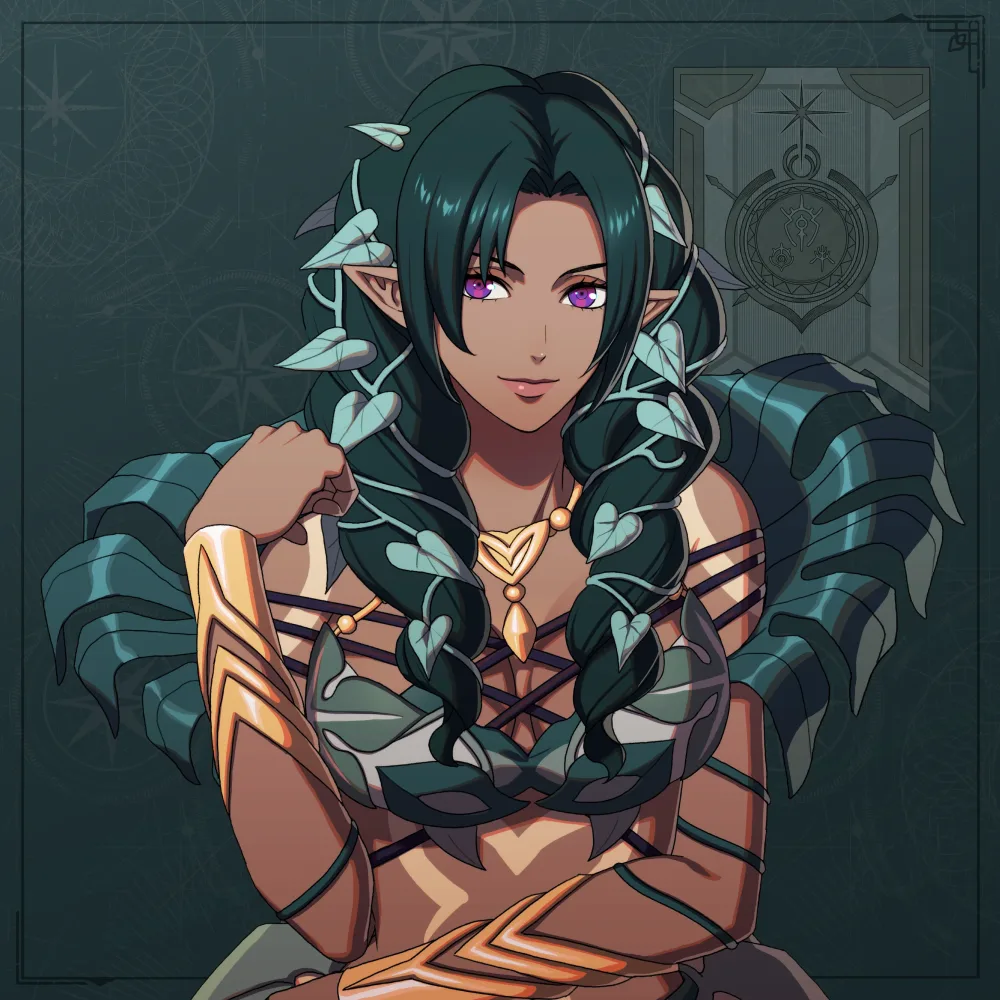
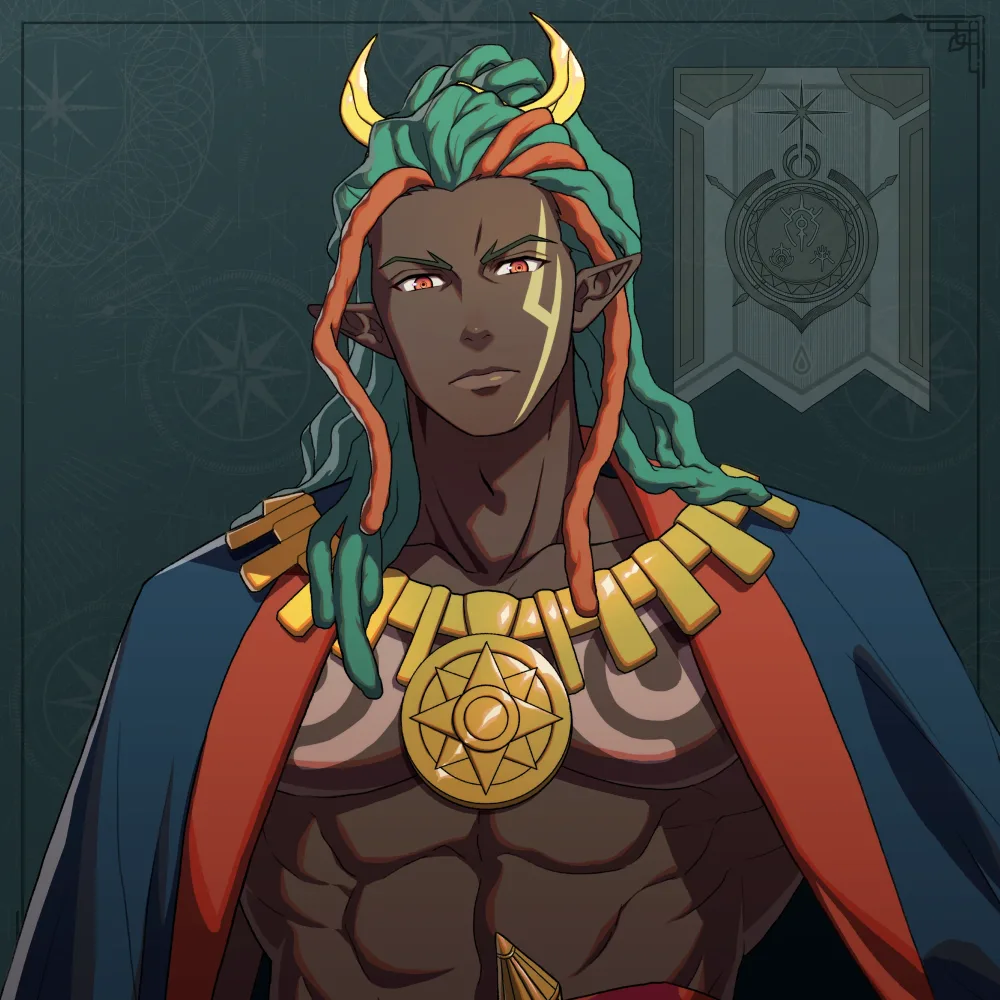

Kalla gives Avo +50 at Level 1, Spd +5 at Level 2 and Mov +2 at Level 3. Mars gives Hit +50 on physical attacks at Level 1, some HP back on defeating a foe at Level 2 and Str +5 at Level 3. The Hit bonus is a flat 50, and the later effects need the later levels: at Level 1 you have only the first.(game8.co, fortunesweave.wiki.fextralife.com)
Those two carried the author’s Part II. Kalla moves a unit further, makes it hard to hit and adds speed, and since doubling needs 4 more Attack Speed than the enemy(game8.co), Spd +5 turns an even match-up into a double. Mars fixes a shaky hit rate, adds strength and heals the unit when it kills. Start Divine Service for both early in Part I so they are at Level 3 before the hard fights.◇ our recommendation: the guide author's own play In Part I, Credna earns a slot too: his Level 1 blessing is Vis +5, which cuts through fog of war on the maps that have it. He does little in Part II, though, and his Level 2 and 3 effects (no weapon durability cost for a turn, attacking first on the enemy’s phase) help less than a levelled Kalla or Mars.◇ our recommendation: the guide author's own play and opinion; the blessing effects are from Game8 and Fextralife The Karma Shard boons that cut each blessing’s Divine Sand cost are on Boons of Salvation, and each god’s trial is on God Trials.
Unit and class tips
The tips below are the author’s, from Dietrich’s route; the figures beside them are sourced. For who is worth the deployment slot see tier list, and for exam requirements and growth bonuses see classes.
- Every white mage should learn Physic.◇ our recommendation: the guide author's own play It heals from a distance, where Heal needs the healer next to the patient (ranges on the spells page). Ten characters learn it. Tialla is the earliest of the Part I cast, at white magic rank C; most of the others get it at rank B.† community spreadsheet(game8.co)
- Black mages want a spell that reaches three tiles as early as possible, so they can hit without being hit back.◇ our recommendation: the guide author's own play Fabio is the only Part I character who gets one early: Mire at black magic rank C. For everyone else the first is Thoron, at rank B or A.† community spreadsheet(game8.co, game8.co)
- Mounted units often lack speed, so a fast one is worth a slot even when they join late.◇ our recommendation: the guide author's own play The class growth bonuses agree for the heavy mounts and not for the light ones: Cataphract is Spd −10 and Charioteer Spd −5, against Light Cavalry at Spd +5.(game8.co, game8.co)
- Bardinger is weak, and most cavalry do better staying Light Cavalry.◇ our recommendation: the guide author's own play On paper Bardinger has the larger strength bonus (Str +10 against +5) and gives up the speed (Spd 0 against +5). allthings.how’s class ranking puts it in its bottom tier, though Game8 still takes Cai’s recommended path through it.(game8.co, allthings.how, game8.co)
- Units built towards Shido are very strong.◇ our recommendation: the guide author's own play Its growth bonuses are Spd +15 and Dex +10, it equips two extra Combat Arts and it adds Crit +5 with a sword. Game8 builds Dietrich towards it.(game8.co, game8.co)
- Axes miss more than swords or spears, and Blacksmith trades movement for hitting power.◇ our recommendation: the guide author's own play Blacksmith’s class ability adds Hit +5 with an axe, which covers part of the gap. Game8 lists it with less movement than the mounted classes; this site has not confirmed the figure.† unverified(game8.co)
Systems, in plain terms
Once your free-time hub opens in Dagsion, all of this shows up at once. Each entry below gives what the system is and the best first thing to do with it. For a priority-ordered checklist against your actual progress, see the matching chapter’s “Free time this chapter” section on Now Playing.
Almost everything below is capped at once per character (or per pair) per in-game week, and every weekly cap resets together every Sunday on the in-game calendar — if you’re close to the weekend with an unused weekly action and can spare the gold, use it, since it does not carry over.(game8.co)
Dates are shown day/month, as in the UK version of the game.
† community-reported, not an official guide One turn is 6 in-game hours, ticking at fixed 6am/noon/6pm/midnight points. Standing around in Dagsion doesn’t burn a turn — only a turn-costing action does (resting, an auto-activity, and so on); fast travel between bases costs a flat 30 minutes; an Inn’s auto-activity jumps the clock straight to the next 6-hour segment.(reddit.com)
- Karma Shards & Boons of Salvation
Karma Shards are earned by completing Notable Deeds (milestones you hit just by playing) and spent on account-wide Boons of Salvation at any Pale Raven's Perch or the Shrine of Causality.
First priority: Increased Exp 10% (500 Karma Shards) first. Gifts Discount 10% (300) is the other pick, but RPG Site lists it as needing one finished Part I path.
(game8.co, game8.co, game8.co)- Quests / the Bulletin Board
Story NPCs, the Bulletin Board in Dagsion, and the Adventure Guide all hand out quests for gold, items and Renown.
First priority: Check the Bulletin Board every time you're in Dagsion: new quests appear per chapter and are worth doing immediately.
(game8.co, game8.co)- Gifts
Give an item to a character in Dagsion to form a New Bond and raise Support, the main lever for recruitment and Support conversations. One gift per character per week.
First priority: Give a gift to the first not-yet-bonded recruitable character you meet, to unlock Meals with them sooner.
(game8.co, game8.co, keengamer.com)- Arena training
Send 2-3 units to train at the Arena for Skill Exp and Support Points between them, or spectate a scheduled match for Skill Exp across your whole roster.
First priority: Wait for a weekend where possible: training costs half as much Gold on Saturday/Sunday.
(game8.co, game8.co)Aim training for Sunday specifically when you can: it's the first day of the weekly reset, so a Sunday session opens with a fresh set of once-per-week training options to spend the discount on. If you miss Sunday, Saturday still carries the same 50% discount per the source above.◇ our recommendation: the author's own recommendation, not a documented fact
- Temple service & Blessings
Send up to 2 units to serve one of six god temples in Temple Row to raise that god's Blessing Level and unlock combat Blessings, plus a 7th (Fortuna's) unlocked automatically by story.
First priority: Serve Credna's temple first; it is named as the best first Blessing to chase, for the Fog of War counter.
(game8.co, game8.co, game8.co)- Meals
Share a meal with a bonded character at an inn (costs Gold) to raise Support and restore Motivation; a few meal options refresh weekly, one use each.
First priority: Spend a unit's Motivation on Training, Acting or Temple Service before restoring it with a Meal or the Thermae, so you don't waste a full restore on an already-full gauge.
(game8.co, game8.co, ign.com, ign.com)Meals are half price on Sundays (Game8 and IGN both state it). The author's own game agrees. If you miss Sunday, share meals another day at full price rather than skipping the Support gain.◇ our recommendation: the author's own recommendation, not a documented fact
- Certification Exams (class change)† unverified
Visit the Exam Proctor in Dagsion during Free Time: "Certification Exam" unlocks a new class tier with a License item; "Reclass" freely switches between classes already certified for that character.
First priority: Level the weapon proficiency an exam needs before attempting it: the source says this improves the success rate.
(game8.co, game8.co, game8.co)- Shops and money
Gold comes from battle/quest/Adventure Guide rewards, selling unneeded weapons and items at the Shopping Arcade, Search auto-activities at an inn, and Gold Mummy drops (Bullion) in skirmishes.
First priority: Sell weapons/items you won't use before a big purchase: sold items cannot be reacquired, so check first.
(game8.co)Running Search as an inn auto-activity nets roughly 200–300 Gold per turn in the author's own game, which makes it the most efficient turn-for-Gold activity documented so far. No guide we read for this page gives that figure (the gold-farming guide above lists Search as a method but not its yield).◇ our recommendation: the author's own play, not documented in any source read for this page
- Renown
A global progression stat raised by quests, Adventure Guide goals, subquests, paralogues, Divine Audiences and automatic main-story progress.
First priority: Treat quests and your route's specialised quest type as your main Renown source: they give the largest single awards.
(rpgsite.net, game8.co)- Support
A global, save-wide level (1S/2S/3S) between a recruitable character and your chosen Lord, raised by gifts, meals, Arena training, Temple service, Thermae, Theatre and battle adjacency. IGN's guide describes what may be this same number differently: a Support Rating 1-5 plus separately named Support Conversations (Rank C rising to Rank A, or S for Eshmel pairings). Both namings are shown here side by side rather than assumed equivalent.
First priority: Spread the once-per-week Support actions (gift, meal, Arena, Temple, Thermae, Theatre) across the recruits you're actively working towards, rather than stacking them all on one character.
(rpgsite.net, ign.com)- Theatre
Watch or Act in a weekly play once unlocked: Watch needs Renown 7, Act needs Renown 8. Only one of the two per week. Game8's theatre guide has you pick characters to watch together, and a pair with the same opinion of the play gains extra Support.
First priority: Once Watch is unlocked, invite non-recruited bonded characters too: Watch is open to anyone you've formed a bond with, not just recruited units.
(game8.co, game8.co, ign.com, ign.com)- Thermae
Pair two units to bathe once Renown 8 is reached; raises Support between them, restores HP/magic/Motivation, and grants a bonus effect. Game8's weekly guide says it lasts until the end of the chapter's main story battle; its Thermae page says until the end of the Chapter.
First priority: Spend the pair's Motivation elsewhere first (Training, Temple Service) before bathing, so the restore isn't wasted.
(game8.co, game8.co)- Feed the Pale Raven
Once the Pale Raven appears in the main story, feed it weekly with any recruited character and pick good conversation responses. Part 1-only, once per new week (Sunday reset); the item offered doesn't matter. Each session is 3 prompts, each with 3 possible reactions and exactly one correct answer: 0 correct is "Bad", 1 is "Good", 2 is "Great", and all 3 is "Perfect Bird Time".
First priority: Feed the Pale Raven weekly once it appears: no source gives its exact unlock chapter, so check for it each visit to Dagsion.
(game8.co, ign.com)
First five chapters
- Start on Normal difficulty with Casual Mode: it disables permadeath and is the most forgiving way to learn the systems.(game8.co)
- Press ZL to highlight enemy threat and attack ranges before committing a unit’s movement.(game8.co)
- Match “effective” weapons to enemy classes for roughly 2×–3× damage. Sources disagree on bows: IGN says they are effective against mounted units, Fextralife says against fliers.(game8.co)
- You need at least 4 more Attack Speed than the enemy to double-attack. Check this before relying on doubling in early, tight fights.(game8.co)
- Save Blaze Arts for genuinely difficult fights rather than using them freely: the gauge they fill reduces your unit’s max HP once it is full.(game8.co, thegamer.com)
- Complete Notable Deeds early on any path: they generate Karma Shards towards Boons of Salvation, which apply account-wide across all four lords’ paths.(thegamer.com)
- Do not try to raise every recruit’s level and skills equally: you will recruit more characters than you can develop at the same pace, so focus your development.(thegamer.com)
- Only buy gifts for characters you plan to recruit or support soon, rather than buying every gift on offer, to avoid running short on gold.(keengamer.com)
- Walking around Dagsion’s facilities does not cost Free Time turns, and neither do training or eating at the inn. Moving on the World Map, resting at an inn, the Gate of the Gods and the inn’s Auto-Activities do, so feel free to visit several facilities in one sitting.(game8.co)
- Learn and use Combat Arts, not just Blaze Arts: once a character learns one for a weapon, it costs that weapon’s durability rather than HP, and can raise might, hit rate or crit rate for that attack. More rules the game leaves out are in the combat guide.(game8.co)
- Prioritise recruiting Rogue-class units (for example Diego, Ursula, Nuzzuo, Kiroc): they loot chests during combat and raise the whole party’s odds of finding higher-rarity items while exploring the world map.(ign.com)
- The License Vendor in Dagsion only sells a limited number of Class-change Licenses; some vendors elsewhere on the world map sell the same Licenses for less than Dagsion’s vendor does.(ign.com)
- A character whose name shows a gold border has new dialogue to hear — this usually refreshes at the start of an in-game month or after a story event, and unnamed NPCs often update alongside them without the gold-border marker.(ign.com)
Replay and New Game+
Neither source consulted for this page describes a traditional New Game+ mode or any post-game-exclusive content. Game8’s own post-game page states this directly: finishing the story returns you to the point just before the final battle, from which you can play or replay any part of the game.(game8.co)
RPG Site’s separate guide reaches the same conclusion in more mechanical detail, calling the system “Replay” rather than New Game+: after finishing any Part I path, you can reload a chapter-by-chapter “bookmark” of that path at any point without losing your completed playthrough. Replaying chapter 2 onward loads exactly as that bookmark was first recorded; only replaying a route from Chapter 1 also re-imports your map exploration and subquest progress from your first playthrough. Support Levels, temple Blessing progress, and Notable Deeds/Boons of Salvation always carry over, since those are tracked account-wide rather than per playthrough.(rpgsite.net)
The Replay and New Game+ guide goes through bookmarks and what carries over step by step.
Read together◇ our recommendation: synthesis of two agreeing sources, not a single source's own wording, this is one system described two ways, not a conflict: there is no separate New Game+ save file, but a Replay/bookmark system that lets you redo any chapter of a route you have started or finished, with your account-wide progress (Support, Blessings, Boons of Salvation) always intact.
One Part I quirk worth knowing before you finish a route: replaying that route’s own Chapter 12 lets you change your final roster, classes and levels before it locks in as the starting point carried into that character’s Part II War Arc.(rpgsite.net)
Game8’s post-game checklist for after finishing a route: play the Part I paths and Part II War Arc runs you skipped, recruit any characters you missed, hunt down the Keys of the Diadem to unlock every Divine class, spend any leftover Karma Shards on Boons of Salvation, and use Descend Again (see Difficulty and modes above) to replay on a higher Difficulty. See Post-game content on the Wiki for the fuller write-up.(game8.co)
World Map locations you have already unlocked stay unlocked in a new path, and you can bypass areas that require a certain Renown level using carriages in Posthouses. Finishing a path also unlocks additional Boons of Salvation, offering bigger bonuses than the ones available before that path was finished.(game8.co)
The world map on this site shows the towns, dungeons and posthouse links charted so far, which saves re-finding them on a second route. Dungeon details are on the dungeons page.
Common regrets
- Training duplicate recruits (the same character met on different lords’ paths) with identical builds. Merge Causality later combines a character’s separate Part I route versions into one Part III unit, inheriting classes, abilities and Combat Arts from each; identical builds waste that benefit, and the choice is locked in once a route is finished, so vary each version’s training deliberately. IGN describes a second option at that merge: instead of just bringing forward the higher- stat version, you can pay in-game currency to combine the best aspects of both.(thegamer.com, thegamer.com, ign.com)
- Starting a second Part I path before finishing the first. Most Part I progress only carries over cleanly when a path is played through from its start, so jumping between lords’ routes early can waste effort compared with committing to one path first.(thegamer.com)
- Spending gold on every gift available rather than reserving it for characters you actually intend to recruit or support soon, leading to a resource crunch.(keengamer.com)
- Skipping Notable Deeds early. Karma Shards and the Boons of Salvation they buy are among the few investments that apply to all four paths, so delaying them means re-earning that account-wide benefit later than necessary.(thegamer.com)
No source found describes a single irrecoverable story or plot choice comparable to a classic Fire Emblem “point of no return” chapter for this game. Treat this list as what guides have identified so far, not as exhaustive.
This guide is free. If it’s helped you, a Ko-fi helps cover hosting.
So many players now use this guide that hosting has started to cost real money, and Ko-fi support has not been enough to cover it, so we have added a small amount of advertising: one ad at the end of a page, never a pop-up or anything over what you are reading. Visitors in the UK, the EEA and Switzerland are asked first, and anyone can change or opt out under Ad choices at the foot of every page. If you would rather it went, please send feedback. With enough support, we will look at removing it.
Support on Ko-fi Support on Ko-fi
Last updated . Written and checked by the guide author; every record names its sources. See how this guide is sourced and what changed.